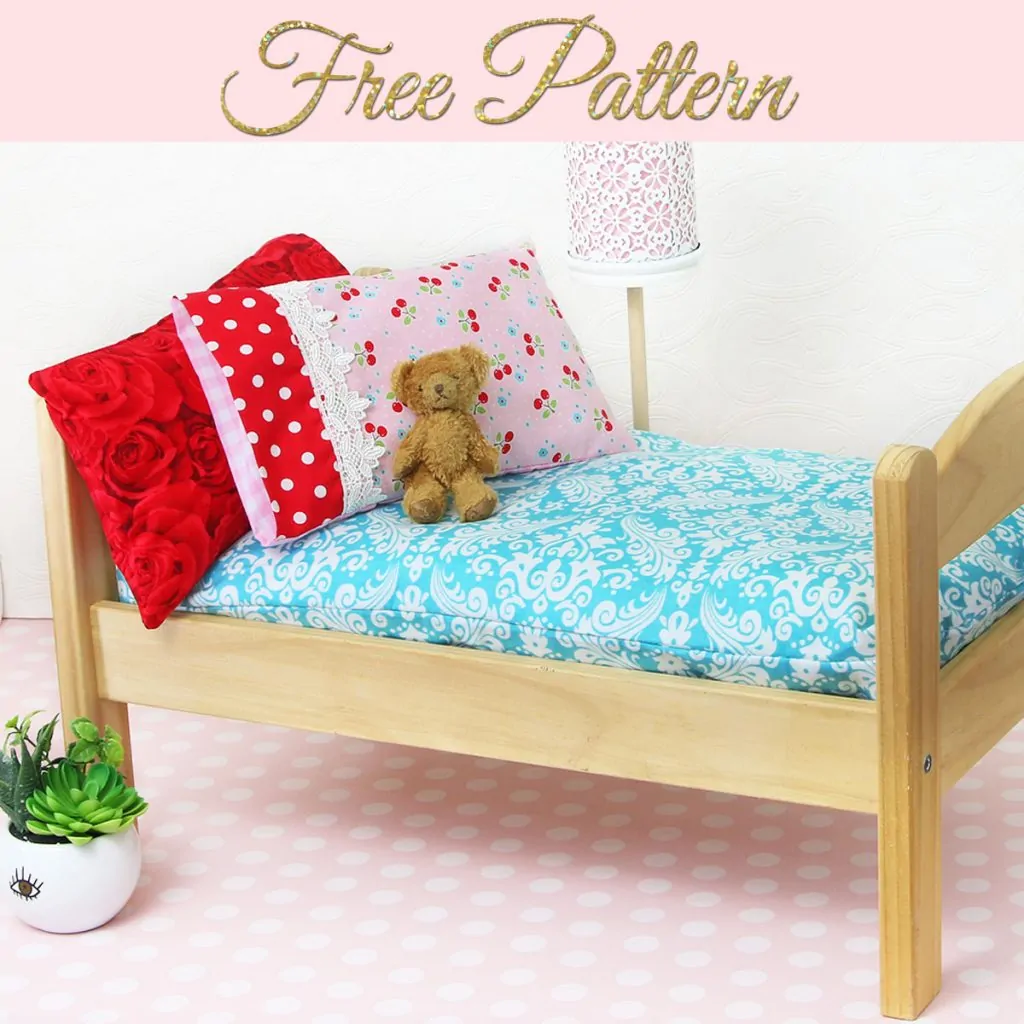
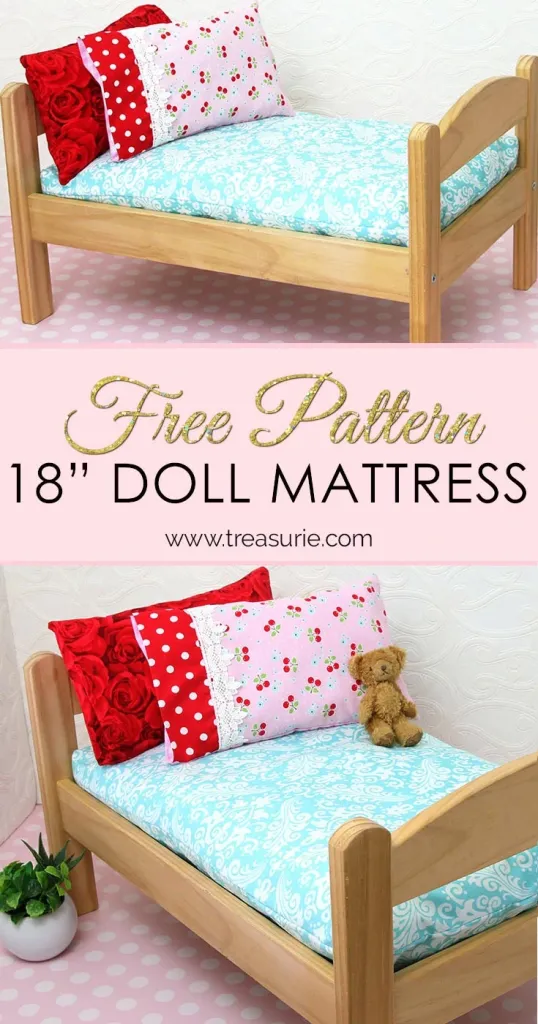
Learn how to create a soft and cozy doll mattress with this simple and easy-to-follow tutorial. This is the perfect finishing touch for your doll's bedding set and will go perfectly with all the other items you've made. This is part 5 of my doll bedding series, where I show you how to make an 18-inch doll mattress. I’ve also provided formula measurements so you can easily adjust this pattern to fit any size bed.
How to Make a Doll Mattress
Supplies
To create your own doll mattress, you’ll need the following materials:
- FABRIC – About half a yard (0.90m) of fabric for most 18-inch doll beds. Cotton fabric is the easiest to work with. I used quilting cotton, which is light to medium weight and tightly woven. It comes in many colors and patterns and is easy to find at most craft stores.
- STUFFING – You can use polyester or foam stuffing. If you don’t have any, you can substitute with small pieces of fabric scraps. This makes the mattress slightly heavier but is a budget-friendly option. Just cut the scraps into small bits to avoid lumps.
For more tips on choosing the best fabrics and tools for doll sewing, check out my guide on making doll clothing.
Topics Covered
Step 1 - Measure the Bed
Start by measuring the base of your doll’s bed. For example, this one was from IKEA and measured 12 x 19 inches (30.5 x 48.2 cm). Make sure you’re only measuring the base and not the sides, as the mattress should fit snugly inside the frame.
Step 2 - The Doll Mattress Pattern
Cut two pieces of fabric to the size of the bed base plus a 1-inch (2.5cm) seam allowance around all sides. So if your bed is 12 x 19 inches, cut the fabric to 14 x 21 inches (35.5 x 53.3 cm).

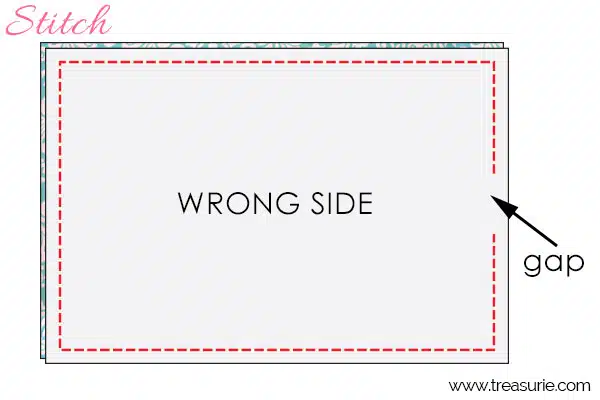
Step 3 - Stitch the Sides
With the right sides together, sew around the edges using a ¼ inch (6mm) seam allowance. Leave a 3-inch (7.5cm) gap on one of the shorter ends. It’s best to leave the gap on the end that will be hidden when placed in the bed.
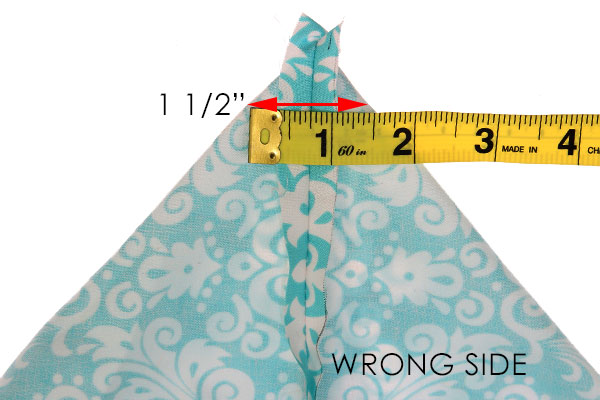
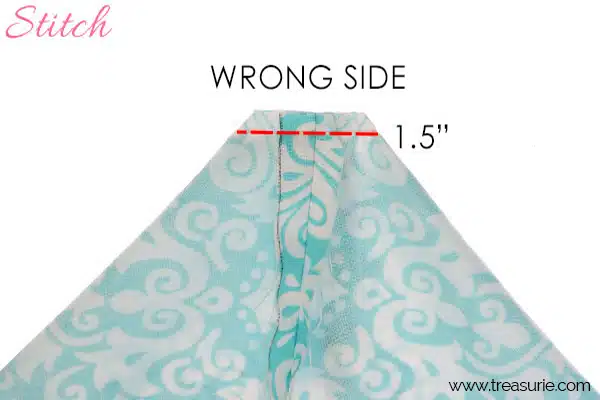
Step 4 - Box the Corners
To add some height to the mattress, press open the corners and align the top and bottom of the seam. Mark across at 1 ½ inches (4cm), then stitch across the marked line and trim it straight.
After stitching, trim the corners neatly.
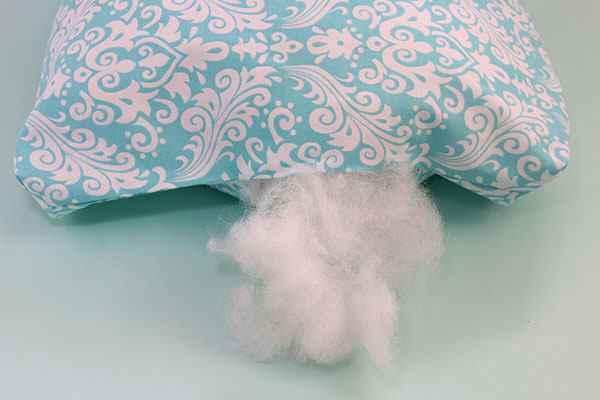
Step 5 - Stuff the Doll Mattress
Turn the mattress right side out and begin filling it. If using polyester fill, break it into small tufts for a smoother finish. Be careful not to overstuff, as this can make the mattress too firm. Make sure to pack the corners well to maintain shape and comfort.
Before closing the gap, test it on the bed to ensure it sits flat like a real mattress. Take your time—no doll wants a lumpy bed, and even a fairy tale princess would prefer a smooth one!
Step 6 - Close the Gap
Finally, hand-stitch the gap using a ladder stitch to make it almost invisible. This ensures a neat and professional look.
In Conclusion
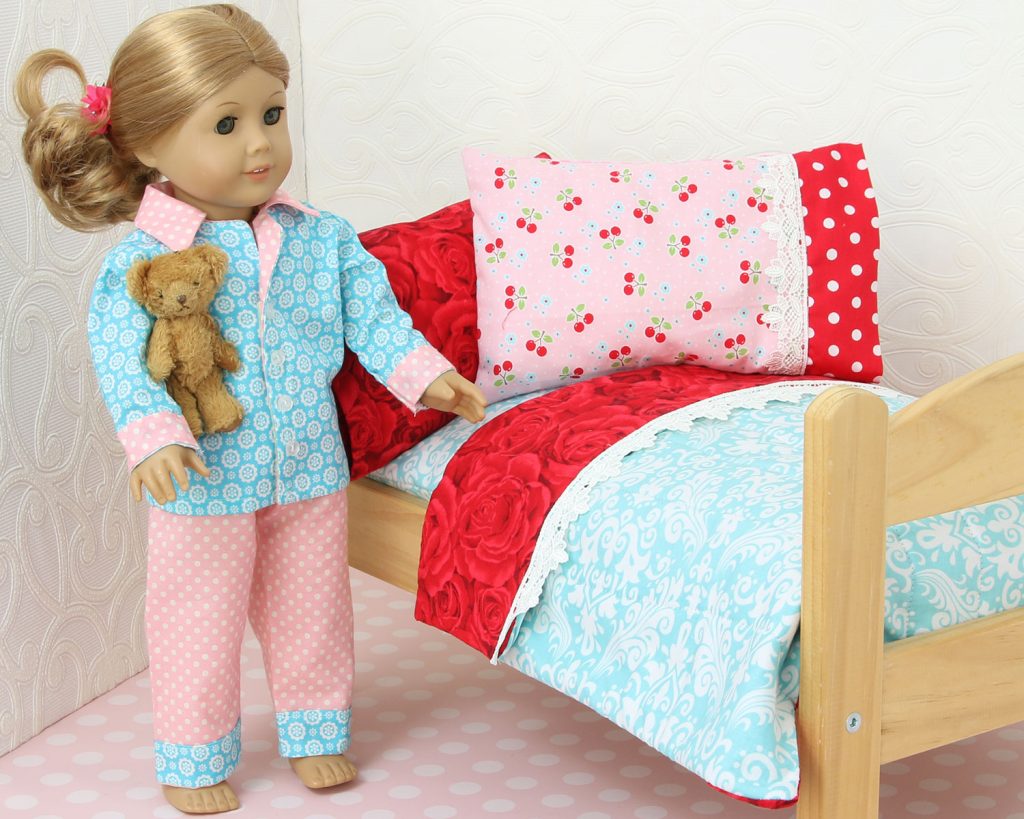
Now that you know how to make a doll mattress, why not continue with the rest of the free doll bedding sewing pattern series? You can create pillows, pillowcases, and blankets to complete your doll's sleeping area.
- PART 1 - Free Doll Pillow Pattern
- PART 2 - Free Doll Pillowcase Pattern - 2 styles
- PART 3 - Free Doll Mattress Sewing Pattern
- PART 4 - Free Doll Blanket Sewing Pattern
Once you're done with the bedding, try making a doll pajama pattern to match. Your little doll will look adorable in her new cozy setup!
Free Doll Clothing Patterns:
- Doll Cape Pattern
- Doll T-Shirt Pattern
Customized Tempered Glass ,Clear Tempered Glass ,Ultra Clear Tempered Glass,Glass Tempered Glass
WCH Temper Glass Co., Ltd , https://www.temperglasswch.com